Welcome back to school! Celebrate the first days of school with an adorable keepsake photo frame students can make out of popsicle sticks. In our September blog post, check out our easy tutorial for making a back-to-school photo frame three different ways. Read on to find out more and get started.
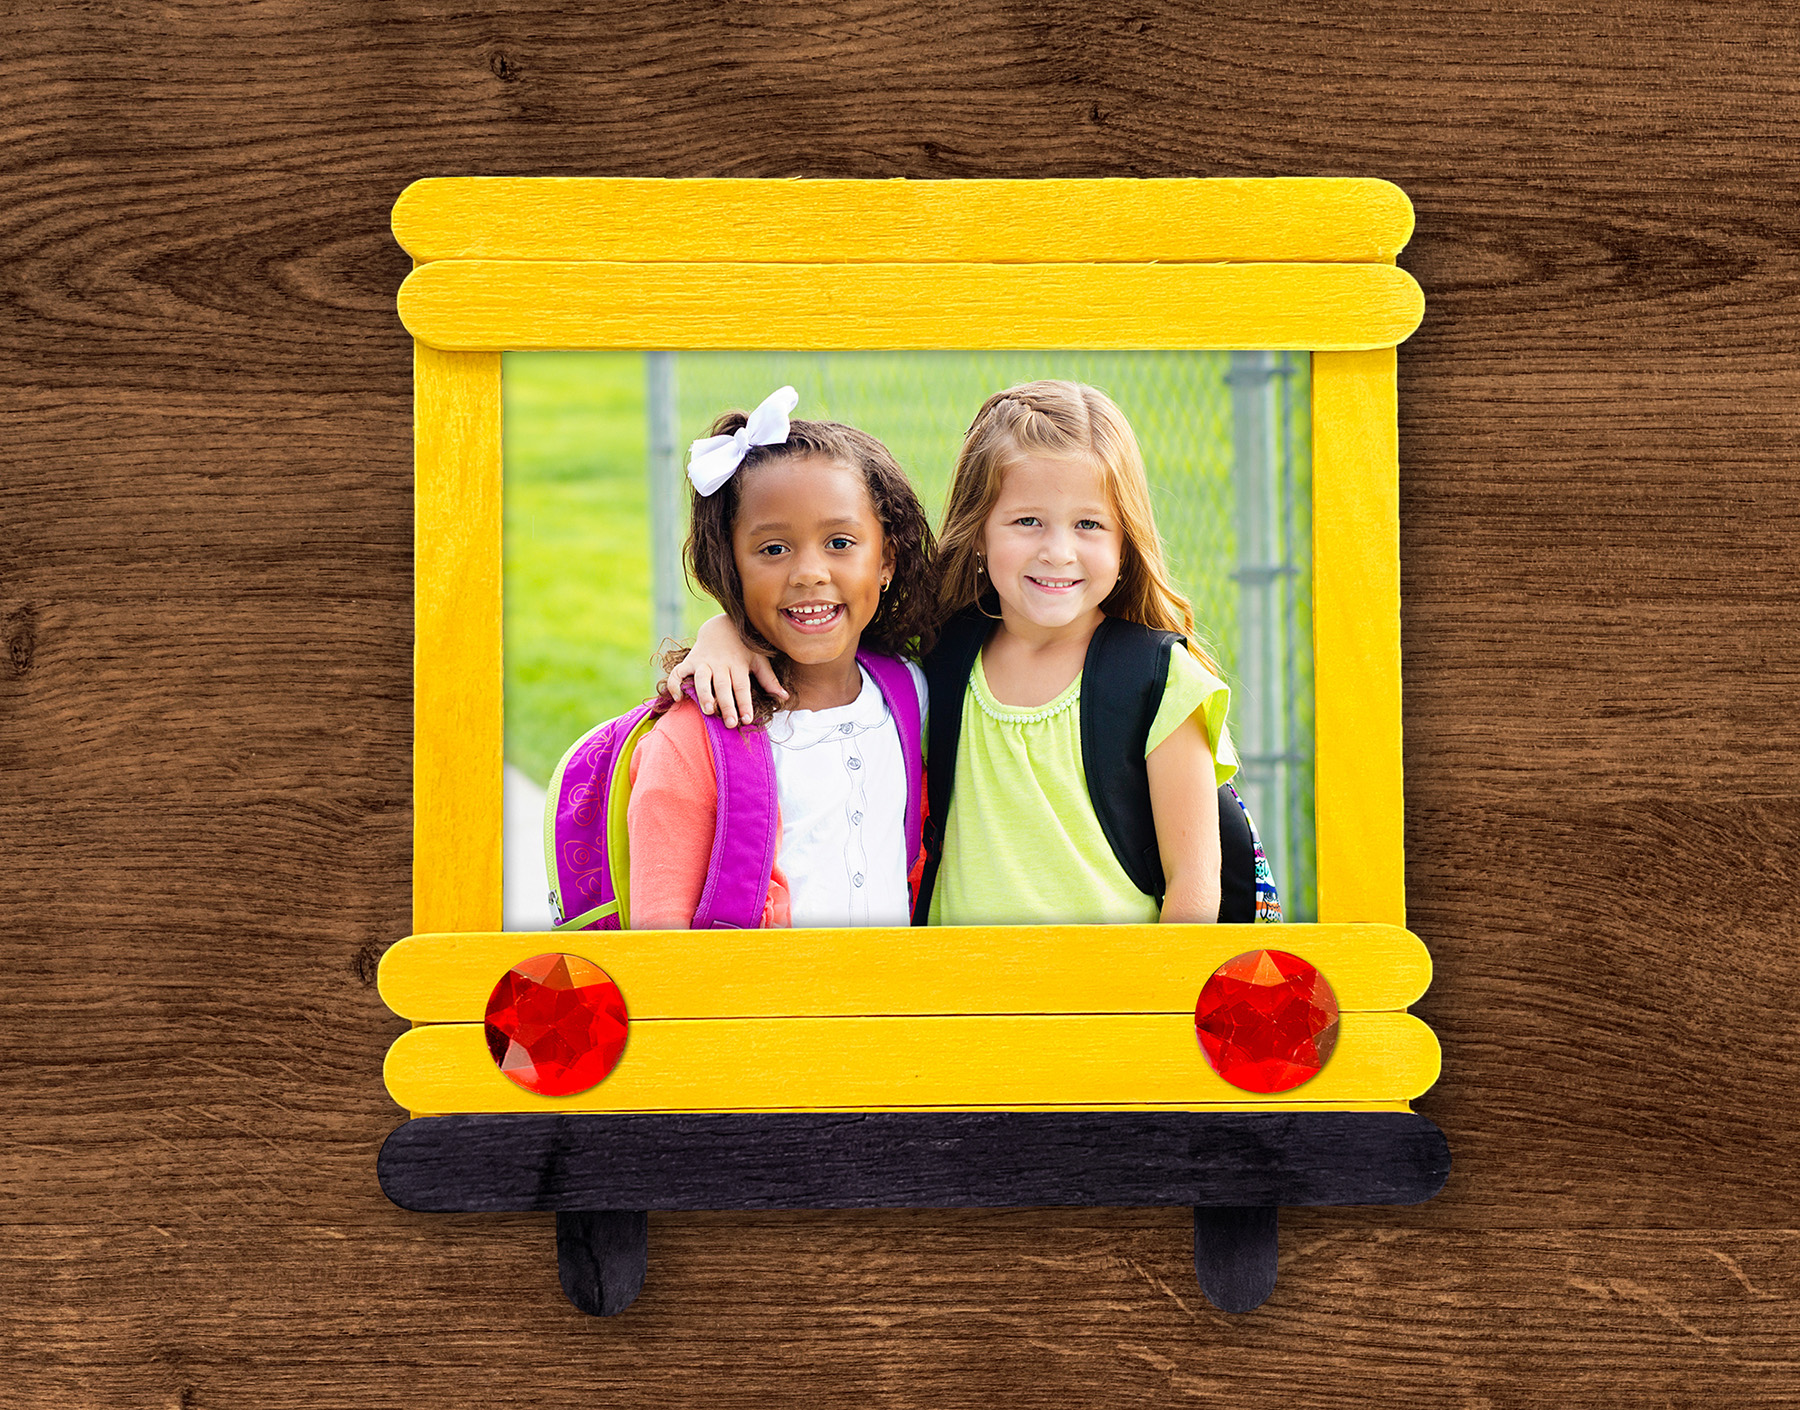
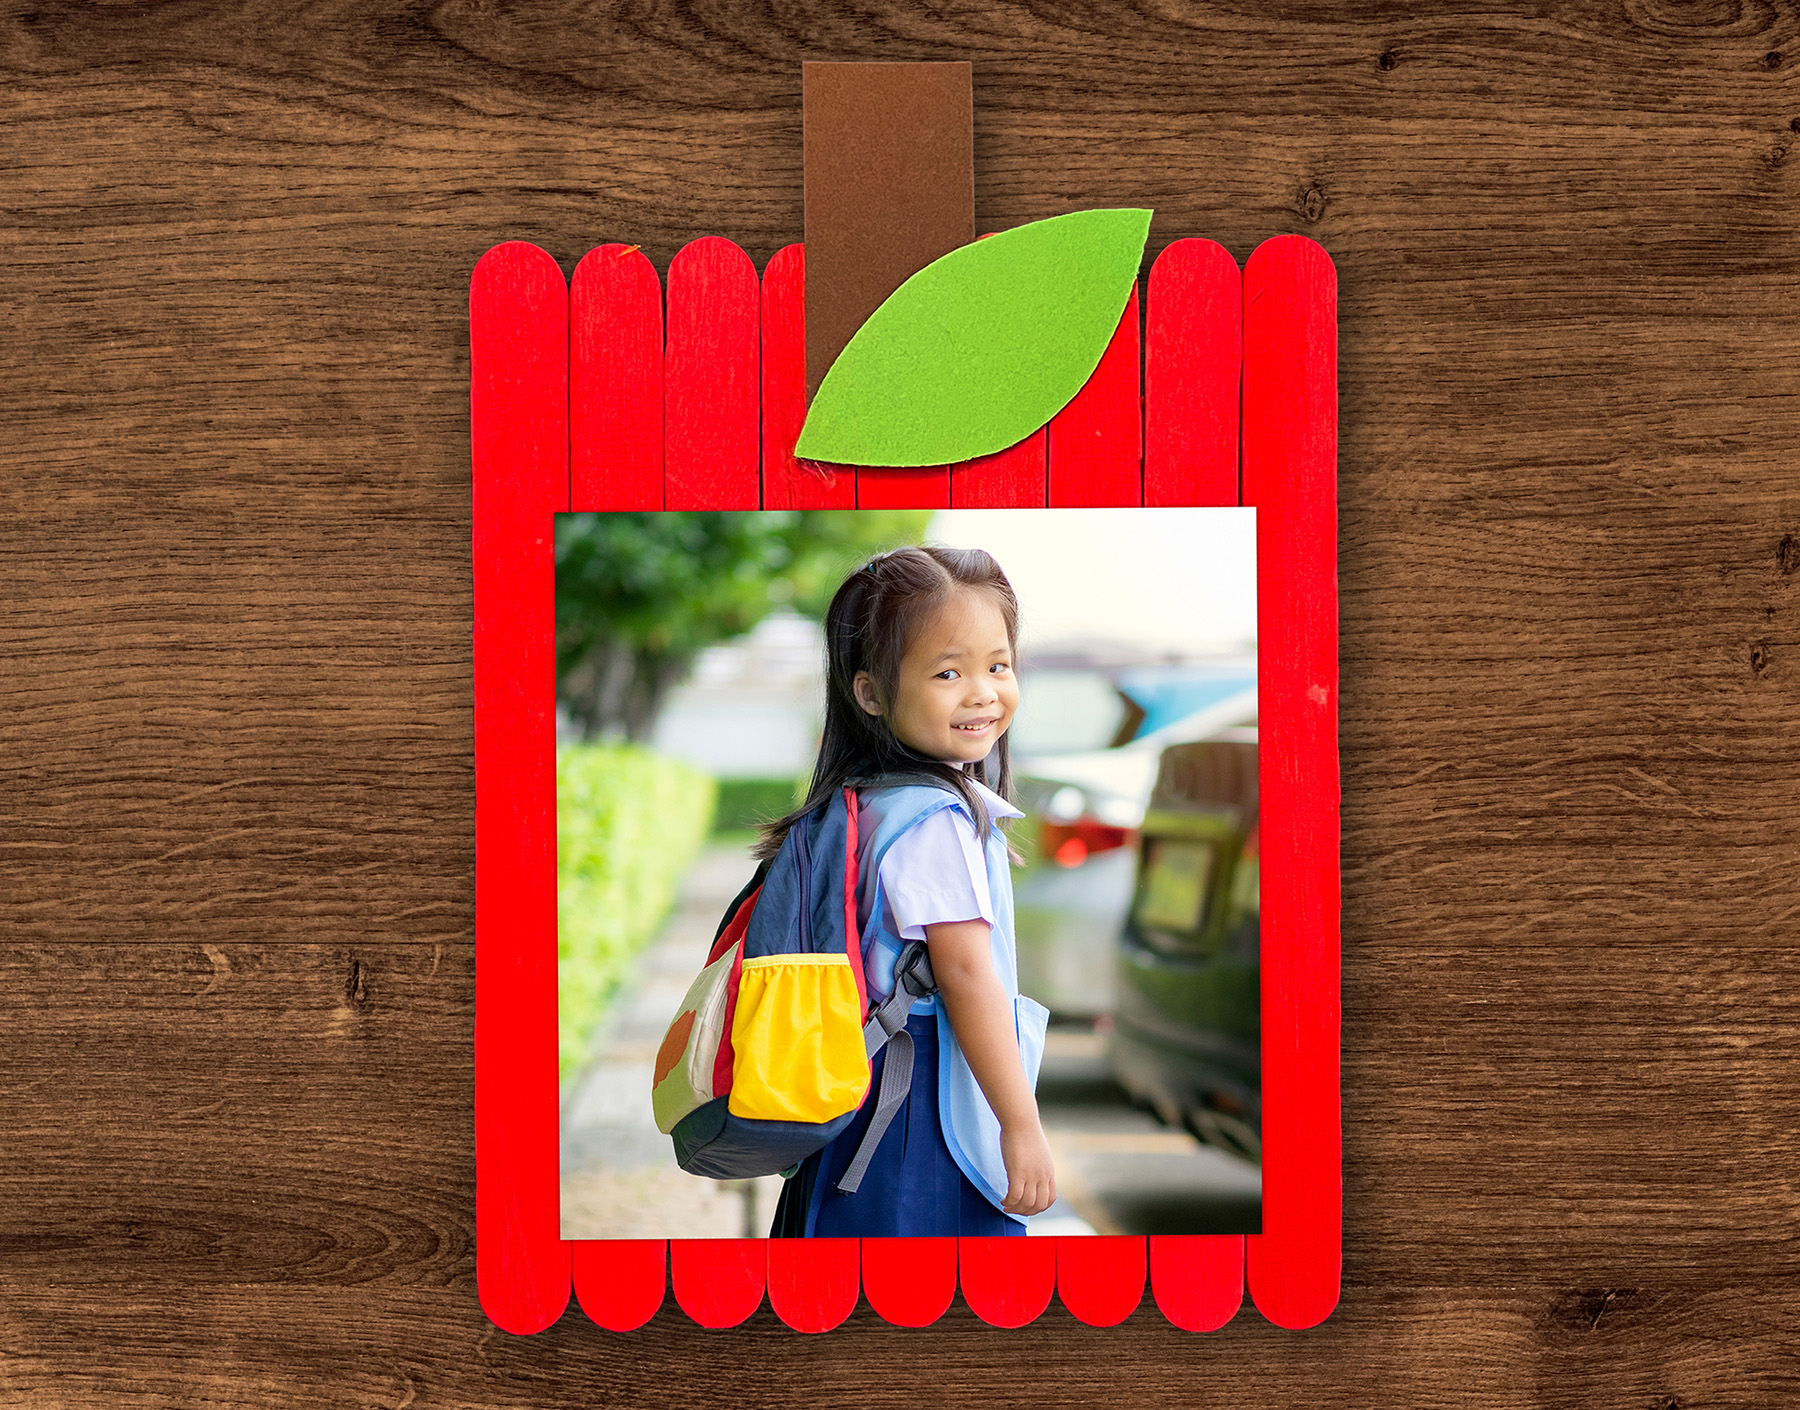
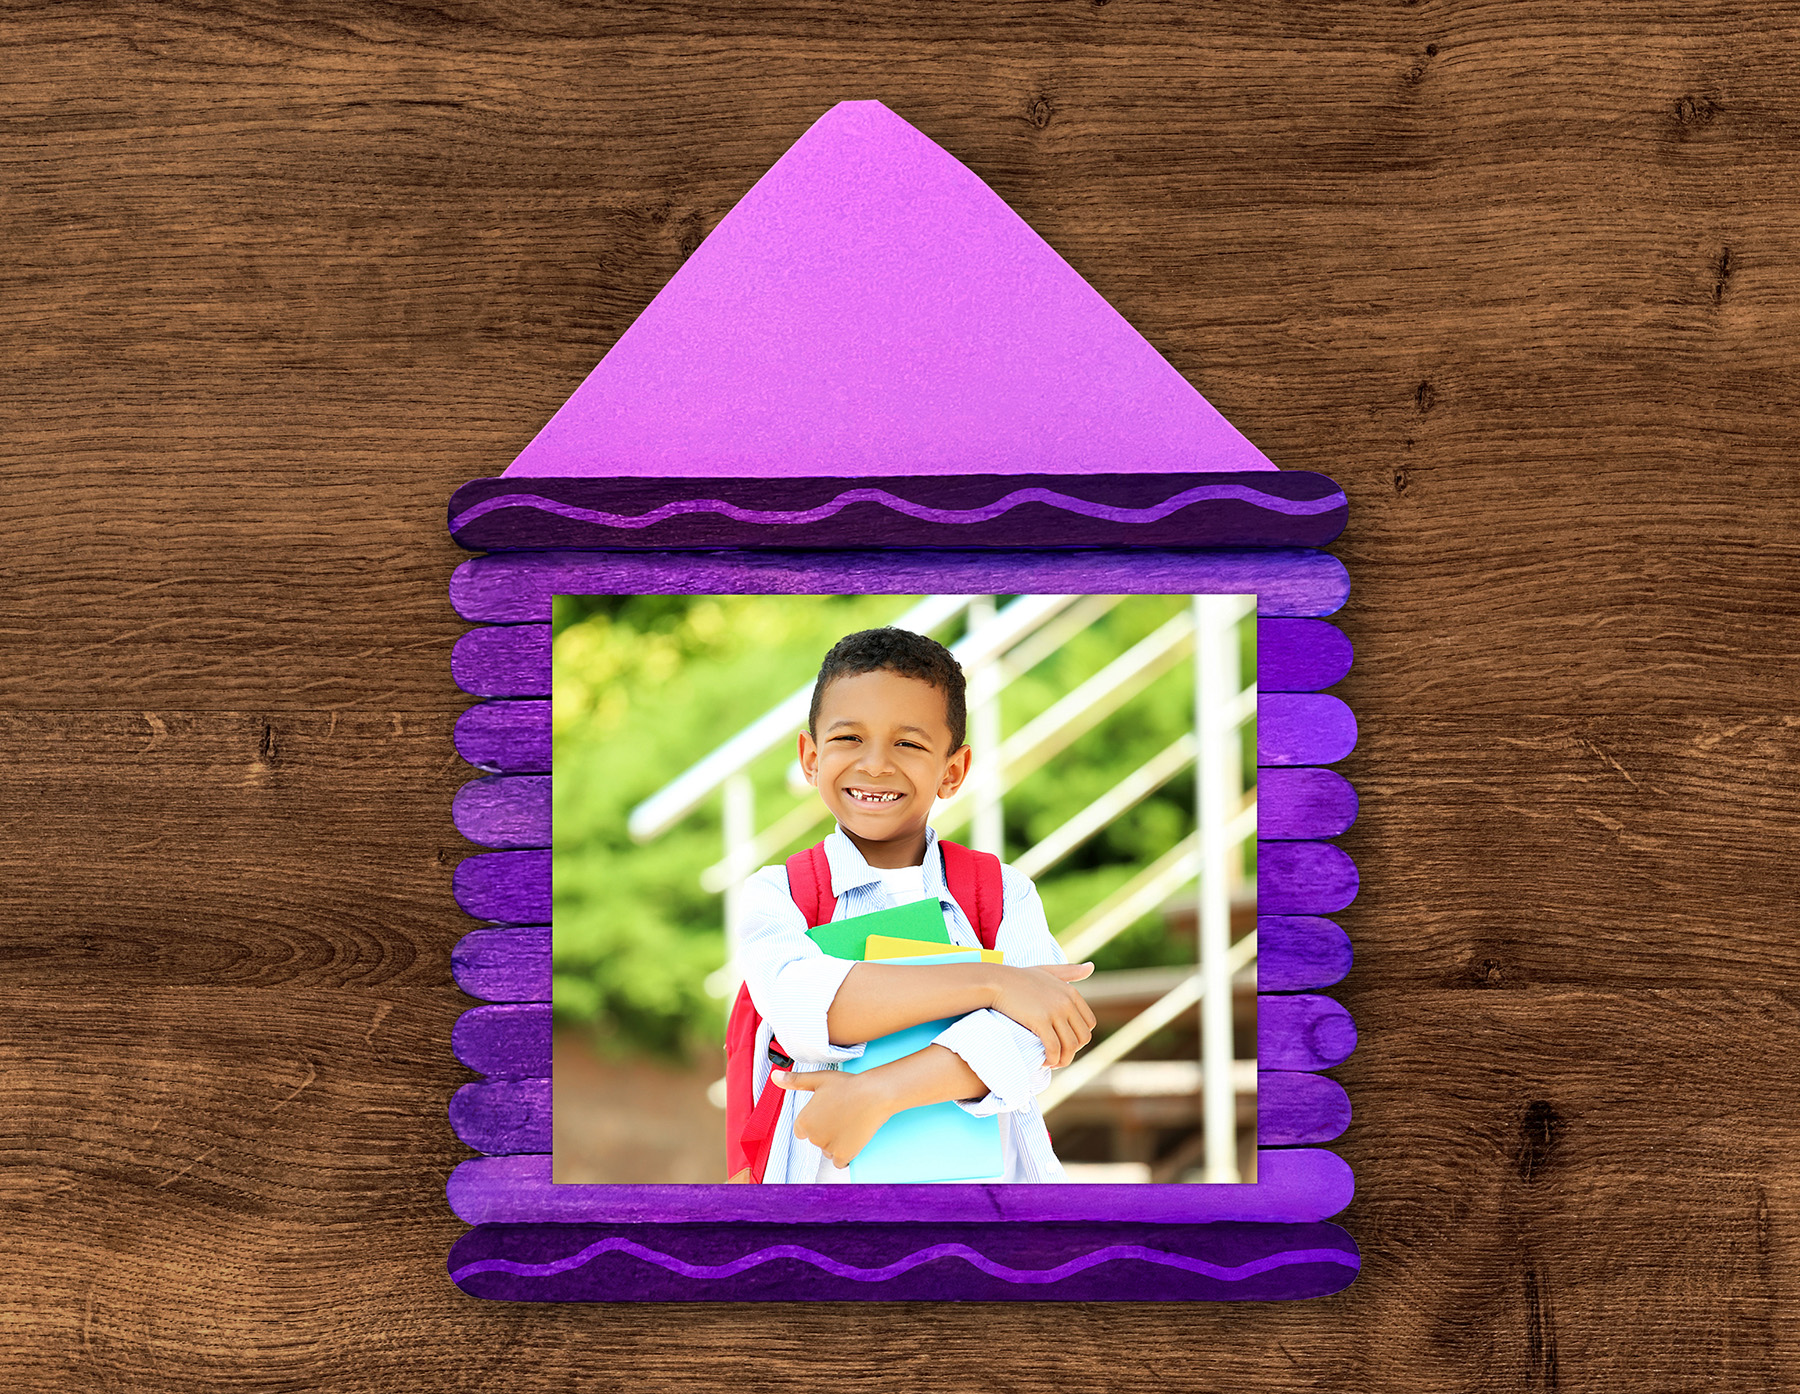
Looking for a great art project to commemorate the start of another school year? Try making these DIY popsicle stick photo frames with your students. Choose from a school bus, apple, and crayon design to display those adorable first-day-of-school pictures.
Here's what you will need to make these back-to-school photo frames:
To make a simpler version of these back-to-school photo frames, we recommend using colored popsicle sticks. This way, you can skip the messy step of painting the popsicle sticks and eliminate the drying time before you move onto the next step. Either way works!

Here's how to make a school bus photo frame:
1. Take four yellow popsicle sticks and glue them together to create a square base for your photo frame.
2. Glue two yellow popsicle sticks to the top of your square base.
3. Glue one black popsicle stick and two yellow popsicle sticks to the bottom of your square base.
4. Cut another black popsicle stick in half and glue each half vertically to the bottom of your school bus to make wheels.
5. Take two red craft jewels and glue one on each side of the bottom of your school bus for brake lights.
6. Add your favorite back-to-school photo to the center of the school bus frame with a little glue and attach magnets to the back of the photo frame. How cute!

Here's how to make an apple photo frame:
1. Take nine red or green popsicle sticks and line them up vertically. Glue them together by attaching them to two more popsicle sticks on the underside.
2. Cut out a small rectangle from a piece of brown construction paper or card stock. Glue it to the top of the apple photo frame for a stem.
3. Cut out a small oval from a piece of green construction paper or card stock. Glue it next to the stem for a leaf.
4. Add your back-to-school picture of choice to the center of the apple frame with a little glue and attach magnets to the back of the photo frame. It's that easy!

Here's how to make a crayon photo frame:
1. Take eleven popsicle sticks in the color of your choice and line them up horizontally. Glue them together by attaching them to two more popsicle sticks on the underside.
2. Use a black permanent marker to make designs on the top and bottom popsicle sticks to resemble the paper wrapping on a crayon.
3. Cut out a triangle from a matching piece of construction paper or card stock. Snip off the very top of the triangle to resemble the tip of the crayon.
4. Add the triangle to the top of the photo frame with a little glue. Attach magnets to the back of the photo frame as well. Pick out a great back-to-school photo and affix it to the center of the photo frame. That's it!
We hope you and your little ones have tons of fun making these easy, adorable photo frames to celebrate the start of a new school year!
Be sure to tag us on social media so we can check out your artwork.
Leave us your feedback in the comment section below to let us know how the activity turned out!
Looking for more fun, educational resources for back-to-school time? Visit the Super Teacher Worksheets Back-to-School Collection.
You may also like: